[ English ]
Dernière modification le 8 juillet 2023 à 12:46
Etape 4 - Interactions avec le monde
Introduction
Pour cette quatrième étape nous allons implémenter les interactions avec le monde. Il y a aura une clé à ramasser, celle-ci permettra d’ouvrir une porte.
Les objets
Création des objets
Commençons par ajouter des constantes dans Constants.h :
// Couleur des box
// ...
const Color KEY_COLOR = YELLOW;
const Color DOOR_CLOSED_COLOR = GRAY;
const Color DOOR_OPENED_COLOR = DARKGRAY;

// Pour une clé de 4 pixels de haut sur 8 pixels de large
const uint8_t HEIGHT_KEY = 4;
const uint8_t WIDTH_KEY = 8;
const uint8_t OVER_CENTER_X_KEY = 4;
const uint8_t OVER_CENTER_Y_KEY = 2;

// Pour une porte de 12 pixels de haut sur 10 pixels de large
const uint8_t HEIGHT_DOOR = 12;
const uint8_t WIDTH_DOOR = 10;
const uint8_t OVER_CENTER_X_DOOR = 5;
const uint8_t OVER_CENTER_Y_DOOR = 6;

// Nombre d'objets
const uint8_t NB_OF_OBJECTS = 2;

// Type d'objet
const uint8_t NO_OBJECT = 0;
const uint8_t KEY_OBJECT = 1;
const uint8_t DOOR_OBJECT = 2;

// État clé
const uint8_t KEY_ON_THE_PLATFORM = 0;
const uint8_t KEY_COLLECTED = 1;

// État porte
const uint8_t DOOR_CLOSED = 0;
const uint8_t DOOR_OPENED = 1;
Nous définirons nos objets par les attributs suivants :
- une position
x; - une postion
y; - un type ;
- et un état.
Dans Object.h, créons la structure pour nos objets :
#ifndef PLATFORMER_OBJECT
#define PLATFORMER_OBJECT

#include <Gamebuino-Meta.h>
#include "Constants.h"

struct Object {
  int8_t x;
  int8_t y;
  uint8_t type; // .... type d'objet : voir constantes
  uint8_t state; // ... état de l'objet : voir constantes
};

#endif
Dans Object.h, ajoutons une fonction pour créer des objets, dont le prototype est le suivant :
Object createObject(
  int8_t aX, int8_t aY,
  uint8_t aType,
  uint8_t aState
);
Dans Object.cpp, définissons la fonction createObject, pensez à inclure Object.h (dans Object.cpp) :
Object createObject(int8_t aX, int8_t aY, uint8_t aType, uint8_t aState) {
  Object anObject;

  anObject.x = aX;
  anObject.y = aY;
  anObject.type = aType;
  anObject.state = aState;

  return anObject;
}
Dans Object.h, ajoutons une fonction pour initialiser nos objets, dont le prototype est le suivant :
void initObjects(Object * aSet);
Dans Object.cpp, définissons la fonction initObjects :
void initObjects(Object * aSet) {
  aSet[0] = createObject(75, 26, KEY_OBJECT, KEY_ON_THE_PLATFORM);
  aSet[1] = createObject(72, 54, DOOR_OBJECT, DOOR_CLOSED);
}
Dans le programme principal, il faut d’abord inclure Object.h.
Ensuite, en dehors des fonctions setup et loop, déclarons un tableau d’objets, soit :
// Autres includes
#include "Object.h"

// Autres variables globales
Object setOfObjects[NB_OF_OBJECTS];

void setup() {
  // ...
}

void loop() {
  // ...
}
Enfin, initialisons nos objets dans l’état LAUNCH_PLAY_STATE :
void loop() {
  // boucle d'attente
  gb.waitForUpdate();

  // effacer l'écran
  gb.display.clear();

  switch(stateOfGame) {
    case HOME_STATE:
      stateOfGame = paintMenu();
      break;
    case LAUNCH_PLAY_STATE:
      initObjects(setOfObjects); // ....... on réinitialise les objets
      initPlatforms(setOfPlatforms); // ... on réinitialise les plateformes
      initCharacter(hero);
      stateOfGame = PLAY_STATE;
      break;
    case PLAY_STATE:
      // ...
      break;
    default:
      gb.display.println("Votre message");
  }
}
Affichage des objets
Commençons par les fonctions spécifiques qui dessinent nos objets.
Dans Display.h, ajoutons le prototype de la fonction paintKey :
void paintKey(
  const int8_t aX, const int8_t aY,
  const uint8_t aState
);
Dans Display.cpp, définissons la fonction paintKey :
// Réalise l'affichage de la clé
void paintKey(const int8_t aX, const int8_t aY, const uint8_t aState) {
  if(aState == KEY_ON_THE_PLATFORM) {
    paintBox(aX - OVER_CENTER_X_KEY, aY - OVER_CENTER_Y_KEY, WIDTH_KEY, HEIGHT_KEY, KEY_COLOR);
  }
}
Dans Display.h, ajoutons le prototype de la fonction paintDoor :
void paintDoor(
  const int8_t aX, const int8_t aY,
  const uint8_t aState
);
Dans Display.cpp, définissons la fonction paintDoor :
// Réalise l'affichage de la porte
void paintDoor(const int8_t aX, const int8_t aY, const uint8_t aState) {
  paintBox(aX - OVER_CENTER_X_DOOR, aY - OVER_CENTER_Y_DOOR, WIDTH_DOOR, HEIGHT_DOOR, (aState == DOOR_OPENED ? DOOR_OPENED_COLOR : DOOR_CLOSED_COLOR));
}
Pensez à inclure Object.h dans Display.h.
Dans Display.h, ajoutons le prototype de la fonction paintObject, qui dessine un objet fourni en paramètre :
void paintObject(const Object &anObject);
Dans Display.cpp, définissons la fonction paintObject :
// Réalise l'orientation vers la fonction de dessin spécifique
void paintObject(const Object &anObject) {
  switch(anObject.type) {
    case KEY_OBJECT:
      paintKey(anObject.x, anObject.y, anObject.state);
      break;
    case DOOR_OBJECT:
      paintDoor(anObject.x, anObject.y, anObject.state);
      break;
  }
}
Dans Display.h, ajoutons le prototype de la fonction paintObjects :
void paintObjects(Object * aSetOfObjects);
Dans Display.cpp, définissons la fonction paintOjects :
// Réalise l'affichage des objets
void paintObjects(Object * aSetOfObjects) {
  for(uint8_t i = 0 ; i < NB_OF_OBJECTS ; i++) {
    paintObject(aSetOfObjects[i]);
  }
}
Modifions, dans Display.h, le prototype de la fonction paint pour y passer nos objets :
void paint(
  Character &aCharacter,
  Platform * aSetOfPlatforms,
  Object * aSetOfObjects
);
Modifions, dans Display.cpp, la fonction paint :
// Réalise tout l'affichage
void paint(Character &aCharacter, Platform * aSetOfPlatforms, Object * aSetOfObjects) {
  paintPlatforms(aSetOfPlatforms);
  paintObjects(aSetOfObjects); // appel de la fonction pour dessiner les objets
  paintHero(aCharacter);
}
Dans le programme principal, dans l’état PLAY_STATE, modifions l’appel de la fonction paint :
void loop() {
  // boucle d'attente
  gb.waitForUpdate();

  // effacer l'écran
  gb.display.clear();

  switch(stateOfGame) {
    case HOME_STATE:
      stateOfGame = paintMenu();
      break;
    case LAUNCH_PLAY_STATE:
      // ...
      break;
    case PLAY_STATE:
      // ...

      paint(hero, setOfPlatforms, setOfObjects);
      break;
    default:
      gb.display.println("Votre message");
  }
)
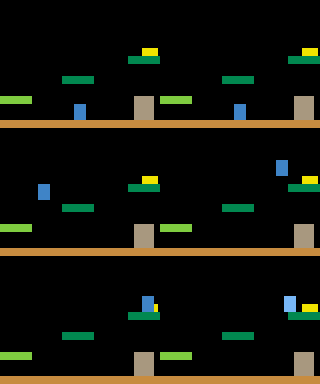
Vous pouvez téléverser votre programme sur votre console, et lancer une partie. Il y a deux nouveaux rectangles : le jaune représente une clé et le gris une porte fermée. Si vous allez ramasser la clé, rien ne se passe, c’est normal ! Nous allons coder les interactions avec les objets dans la suite de cette étape.

Interactions avec les objets
Modifions le personnage, dans Character.h, ajoutons-y un attribut pour indiquer si le personnage a ramassé la clé :
struct Character {
  /* ... */

  bool haveKey; // ........ true si le personnage a la clé, false sinon
};
Dans Character.cpp, dans la fonction initCharacter, indiquons que le personnage ne possède pas la clé :
void initCharacter(Character &aCharacter) {

  /* ... */

  // par défaut, le joueur n'a pas la clé
  aCharacter.haveKey = false;
}
Crééons un fichier nommé Interactions.h, il permettra de gérer les interactions avec les objets, ajoutons-y la fonction isContactWithObject :
#ifndef PLATFORMER_INTERACTIONS
#define PLATFORMER_INTERACTIONS

#include <Gamebuino-Meta.h>

#include "Constants.h"
#include "Character.h"
#include "Object.h"

const uint8_t isContactWithObject(
  const Character &aCharacter,
  const Object &anObject
);

#endif
Dans Interactions.cpp, ajoutons la définition de la fonction isContactWithObject, pensez à inclure Interactions.h (dans Interactions.cpp) :
// Indique s'il y a une collision avec l'objet en paramètre
const uint8_t isContactWithObject(const Character &aCharacter, const Object &anObject) {
  int8_t xObject = anObject.x;
  int8_t yObject = anObject.y;
  uint8_t widthObj = WIDTH_KEY;
  uint8_t heightObj = HEIGHT_KEY;
  switch(anObject.type) {
    case KEY_OBJECT:
      xObject -= OVER_CENTER_X_KEY;
      yObject -= OVER_CENTER_Y_KEY;
      break;
    case DOOR_OBJECT:
      xObject -= OVER_CENTER_X_DOOR;
      yObject -= OVER_CENTER_Y_DOOR;
      widthObj = WIDTH_DOOR;
      heightObj = HEIGHT_DOOR;
      break;
  }

  if(gb.collideRectRect(aCharacter.x - OVER_CENTER_X_HERO, aCharacter.y - OVER_CENTER_Y_HERO, WIDTH_HERO, HEIGHT_HERO, xObject, yObject, widthObj, heightObj)) {
    switch(anObject.type) {
      case KEY_OBJECT:
        return (anObject.state == KEY_ON_THE_PLATFORM) ? KEY_OBJECT : NO_OBJECT;
        break;
      case DOOR_OBJECT:
        return DOOR_OBJECT;
        break;
    }
  }

  return NO_OBJECT;
}
Dans Interactions.h, ajoutons le prototype de la fonction interactionsWithWorld :
void interactionsWithWorld(
  Character &aCharacter,
  Object * aSetOfObjects
);
Dans Interactions.cpp, définissons la fonction interactionsWithWorld :
// Réalise les interactions avec les objets s'il y a collision
void interactionsWithWorld(Character &aCharacter, Object * aSetOfObjects) {
  for(uint8_t i = 0 ; i < NB_OF_OBJECTS ; i++) {
    const uint8_t aTypeOfObject = isContactWithObject(aCharacter, aSetOfObjects[i]);
    switch(aTypeOfObject) {
      case KEY_OBJECT:
        aSetOfObjects[i].state = KEY_COLLECTED;
        aCharacter.haveKey = true;
        break;
      case DOOR_OBJECT:
        if(aCharacter.haveKey) {
          aSetOfObjects[i].state = DOOR_OPENED;
          aCharacter.haveKey = false;
        }
        break;
    }
  }
}
Commençons par inclure Interactions.h dans le programme principal.
Enfin, dans l’état PLAY_STATE, avant d’afficher le jeu, ajoutons l’appel de la fonction interactionsWithWorld :
void loop() {
  // boucle d'attente
  gb.waitForUpdate();

  // effacer l'écran
  gb.display.clear();

  switch(stateOfGame) {
    case HOME_STATE:
      stateOfGame = paintMenu();
      break;
    case LAUNCH_PLAY_STATE:
      // ...
      break;
    case PLAY_STATE:
      // ...

      interactionsWithWorld(hero, setOfObjects);

      paint(hero, setOfPlatforms, setOfObjects);
      break;
    default:
      gb.display.println("Votre message");
  }
)
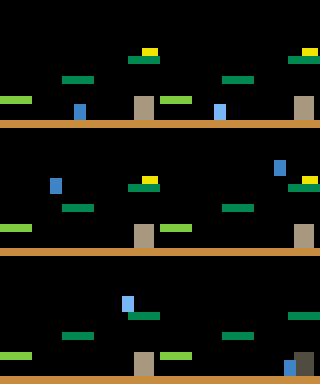
Téléversez votre programme sur votre console, et constatez maintenant que vous pouvez ramasser la clé puis ouvrir la porte.

Conclusion
Vous voici arrivé à la fin de cette quatrième étape : nous avons créé, affiché et interagi avec les objets.
Dans la prochaine étape, c’est-à-dire la cinquième, nous aborderons la gestion de la partie et nous ajouterons un chronomètre.
N’hésitez pas à me faire un retour : les améliorations que vous apporteriez (un regard extérieur est toujours bienvenu), les choses que vous n’avez pas compris, les fautes, etc. Pour laisser un retour, merci d’ajouter un commentaire à la création suivante :
Lire la suite ››